Background

Friday, February 10, 2012

Simple Salvage: Chicken Feeder Cookbook Rack

Cookbooks are for the birds...well, the chickens at least!  
And that's apparent in this simple salvaged project:  a cookbook rack made completely out of an old chicken feeder!  

This is about as simple of a repurposing project as you can get.  The only materials needed are the chicken feeder, polyurethane, and the cookbooks to fill it (possibly some screws, depending on where you place it and if you have little ones running around).

The beauty is in the dividers.  Maybe it was an act of fate or some freakish repurposing foresight on behalf of the manufacturer, but most old chicken feeders have a wire divider that magically fits cookbooks just perfectly!


It's like a primitive filing cabinet!

Put in a call to all of your farmer friends, or hit up some antique shops and you will be sure to find one!  We found this one in a father-in-law's barn collecting dust and getting ready to head to the scrap yard.  

As you can imagine, it was filthy.  Chicken doo and all.  So the most important step was to clean the old girl.  We just mixed up a bucket of Dawn liquid and water and took the scrubbie to her.  Once it was dry, we decided to apply a coat (or two) of satin finish polyurethane.  As with most old feeders that you will find, this one had quite a few areas where rust had developed over time.  The polyurethane will not only protect the cookbooks from the rust, but it will also stall the development of any additional rust!

Now for installation.  We propped ours up on top of an old bench that was about the same width as the feeder itself.  Since wiggle room is scant (not to mention the wee ones running about) we felt it was a good idea to bolt it down to the bench.  

We used simple L-brackets to bolt it down, but the key to blending them in is a little soak in a magic potion we call Muriatic Acid.  Be careful when you this powerful stuff; get out the goggles, the mask, etc. because it can be dangerous.  But this corrosive mineral acid will instantly make your new metal look old and you will find that it can be an invaluable tool for all of you that love this old stuff.


And it's that simple.  
Kind of ironic, we are now getting our meal inspirations from an old metal bin that used to feed the chickens.  
Yum.


Monday, January 30, 2012

Fashion a Farmhouse Table

Ah, the harvest table; or "Farmhouse Table" as we've come to know it in modern society.  What was once a staple in 19th century America for the lowly purpose of sorting produce has become a chic statement piece commanding attention in dining rooms everywhere.  Far from its humble beginnings as a simple work surface, these tables are now commanding a high price tag at popular retailers everywhere, and for good reason.  Not only can it blend seamlessly with a rustic interior, but it can also hold its own in a shamelessly trendy loft.  Also, with many design philosophies now focusing on the blending of a wide array of textures rather than colors, this rustic table always delivers in a big way.  But most of us can't afford to go drop $2000 when we already have a perfectly good surface on which to consume our meals.  To search for a good farmhouse table, here is a pretty good example of what you might find: 
This little nugget from our friends at Layla Grace will set you back a cool $1500 once you include the cost of shipping.  And these selections from Pottery Barn and DWR exceed even that price tag:


Fabulous, yes.  Affordable, no. 
So what to do?  

Make your own of course!!

Well, not make it...but find a cast-off table with good lines and transform it into the farmhouse table of your dreams!  The process is simple, and this specimen that we created only cost around $100 to make.


Here's what we did.  First, we checked out local thrift shops for the right table and ended up finding this one at the Habitat for Humanity ReStore for $40 (a GREAT resource for all kinds of old, fun finds).


It was initially painted all white, so we had to strip it.  Yes, we are well-aware than even the most die-hard DIY'ers can be scared away at the thought of stripping paint.  It is time-consuming, stinky, and tedious.  Well lucky for you, it's fairly simple in this case!  

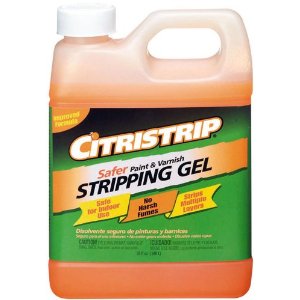
Problem Solver #1:  We chose "Citristrip" stripping gel because it has no harsh fumes and is even safe for indoor use.


Problem Solver #2:  We decided to paint the base of our table, so that required absolutely no stripping!  Layers of paint are acceptable and even welcome when it comes to antique-inspired furniture.  And for the top, while we wanted to get most of the paint off, we figured leaving a little bit would only add to it's character ("character" sometimes being another term for "convenience").

Now for the color.  To create the look of layered-on paint for the base of the table, we considered the already-existing white our first layer.  For the next layer, we dug into our paint closet and picked out some extra black paint leftover from a previous project (PLEASE do this for under-coats, as it saves money, and random colors peeking through only add to the interest of the final piece!)  For the final (and primary) color, wanted something that would be a close replica to paint shades that were used in 19th century America, so we chose to use paint line "Old Century Colors".  Their meticulous dedication to developing colors that mimic those from colonial times always makes these paints favorites for us!


From this palette, we chose to use #2018 Plymouth Blue since, let's face it, every interior space could benefit from a little turquoise. 

After having our layering of all three colors in place, we took the medium-grit sandpaper to random areas on the base of the table.  Some areas we just let the black peek through, other areas the white, and in some spots sanded all the way down to the wood.  Yes, you can get into using crackle medium and all that jazz, but we wanted this project to be simple.  The more "mediums" and glazes come into play, the more your project is going to cost, and that takes the fun out of the "This table only cost me..." stories that you will be telling at your next Thanksgiving get-together.

Now for the piece-de-resistance: the top.  What screams "Farmhouse" more than seemingly-salvaged planks?  Nothing.  Sooo, since this $40 table of course did not have a plank top, we decided to simulate one with our good-old-friend The Skill Saw.  We set her to a depth just deep enough to score the surface without weakening the wood.  We "sawed" two lines down the length of the table to create three equally-sized "planks".


And now the fun part:  beating the bejeezies out of it so it truly looks like it came straight out of 1800's.  We used hammers, nails, screws, chains, saws; pretty much everything we thought would olden it up!  This is something that is at its most fun when there is anger and frustration to let out.  Not that we have any of that, just sayin'.  

After the intense beating, we used a Minwax stain that we had custom blended at Home Depot using a grey tone with a little bit of golden tone thrown in.  This created a warm, weather-beaten hue that was perfect for this tabletop.  We then finished the whole top off with a Finishing Wax from Minwax that lent an almost sheen-less protective coating.


Our final little touch was to purchase an amber glass knob for the drawer from Hobby Lobby for $2.48 on 50% off day!

All-in-all, it will set you back a weekend.  But the "where-did-you-get-that"s will be totally worth it, especially when you hear the gasps after revealing your cost!


Thursday, May 26, 2011

Cute & Clever: CAKE STANDS!

At Designed Sealed and Delivered, we love great homemade gifts.  And what could be a more inventive homemade gift than some freshly baked buttermilk cupcakes topped with maple icing and candied bacon?  
We'll tell you what:  Those fancy little cupcakes presented to the recipient on an adorable HOMEMADE CAKE STAND!
 This little project has everything going for it.  It's adorable, inexpensive, simple, and completely inventive.  Here’s what you need to do:

Find an attractive plate. 
The fun part!  Pop in at garage sales, estate sales, or pay a visit to Goodwill (or even Grandma’s china cabinet!)  There are beautiful old plates EVERYWHERE, but they sit around collecting dust because most of us can’t see a use for a lone plate that has lost its set years ago.  Now we can scoop them up and put them to good use!  And use all different sizes, depending on what kinds (and amounts) of baked goods you are presenting.  Even a shallow dish can be fashioned into a spanking candy dish.

Find a base.
Okay, another fun part!  While you’re hitting the sales look for items like candlesticks, pretty glasses, or a small vase to use as a base for your stand.  And while we want these pieces to be beautiful, the most important part is to make sure they are flat on top.  Simply place the plate on top of your potential base to see if it appears level before gluing. 

Assemble.
First, apply an adhesive to the top of your base.  Our tried and tested choice is Household Goop, and you want to let this cure for 5 to 10 minutes before actual assembly. 
Then make a mark in the middle of the bottom of the plate to assure that it is nice and centered.
After the curing time is up, place the plate on the base as close to the mark as you can (there will be a little bit of wiggle room if you don’t get it just right upon placement!). 
Let the adhesive cure for 24 hours before use.
And to think, after slaving away on those cupcakes all afternoon, a simple cakestand is going to swoop in and steal the show!


Note:  The cupcakes in the first photo were baked from scratch at Sweet Creations by Anesha in Saginaw (Delicious, and yes, addictive!)


Sunday, March 27, 2011

Weather your Wood

The world fits into exactly two categories:
Those who like to make old things look new
and
Those who like to make new things look old

Call us crazy, but more often than not, we fit into the second category.  There is just something about the warmth and story behind something old that makes it so attractive.  And believe it or not, more and more people are beginning to appreciate the beautiful patina that vintage and antique objects hold.  One of our favorites is old barnwood.  Not only has this workhorse of the wood world withstood tens or hundreds of years out in the elements, but it has done it in style.  The silvery grey finish that it has walked away with is unmatched, as is its ability to be paired with any other wood finish and still look fabulous.  We are living in an age where layering textures is all the rage, and this little baby will get the job done.

Only problem:  Not all of us have an old barn in our backyard waiting to be disassembled.  So that leaves some of us with the only option of making new wood look old.  Easier said than done, since wood stain companies have decided to not carry a transparent grey stain (why, we will never know).  So after much research and testing, we have found a method of turning brand new wood into a beautifully weathered silvery-grey with SIMPLE HOUSEHOLD ITEMS!

Here is what you will need:
Tea bag
1/2 c. boiling water
Small chunk of steel wool
1/2 c. white vinegar
Paint brush

First, place your tea bag in the boiling water and let it steep for a couple minutes.  Then "paint" the tea onto your board and let it dry.  

Separate the steel wool into smaller shreds and place it in a glass jar with the vinegar.  Cover and let it stand overnight.

In the morning, strain the steel wool out of the vinegar and "paint" the vinegar onto the wood.  Wait about a half an hour and you will have a board that looks strikingly similar to barnwood!

You know, if you're one of the crazies that's into that sort of thing ;-)

Sunday, March 6, 2011

Faux Firelight

Do you have a non-functioning or faux fireplace?  Sure, it's great to have that mantle to display your favorite artwork or knick-knacks; and it IS a really great focal point for the room...but what about the empty hearth?  You could spend hundreds or thousands of dollars on a gas insert OR you could create  faux firelight by yourself for little cost and even less effort!


Creating these warm little bursts of firelight are Flicker Flame light strands!  Each light sends off an orange flicker that creates the illusion of a real fire warming up the room.  Assembling this quick project is so simple!

First you will need to purchase a grate for your fireplace (this is the metal contraption that holds your logs in place).  These can be purchased for a few dollars at estate sales, garage sales, or second-hand stores.  Don't have time to search?  You can pick up a brand new one for as little as $30 for a simple model.

Now for the lights!  We found ours at Lowe's priced out at $8.99 for a strand of 10, and we purchased two strands for this size fireplace.  We did purchase them around Christmastime, so availability could be sketchy at this time of the year.  But as with most things nowadays, they can easily be found on the Internet for purchase.

Onto foraging fun:  the gathering of the logs!  We chose to use birch for our fire simply because we love the texture and color, but any kind of wood would suit this project just dandy.  For a more realistic effect we split the wood, but this is a step that could easily be skipped if you don't have a lumberjack at your fingertips.

And now to assemble.  In order to conceal your cords as much as possible, weave the lights through log by log as you arrange them.  This will take a little patience, but you don't want ugly cords getting in the way of enjoying your fiery display.  


As you can see in this picture, the visible cordage is minimal.  Take your time, start over if you have to, but get those cords out of sight!  For a creative conceal of the extension cord, we added a fireside basket filled with extra wood (realistic AND functional!)


And to give you an idea of the warm glow it throws off at night:


So pour yourself a cup of decaf, grab a blanket, and cozy up to your fancy new fireplace.


Tuesday, March 1, 2011

The Paris Market (heaven in Savannah!)

For any of you that may be traveling to Savannah, GA anytime soon, here is a store that you cannot miss! 
The Paris Market & Brocante is a extraordinarily eclectic shop that combines the finest of vintage, handmade, and new items.  These items are integrated so seamlessly that it will leave you guessing which category each find fits into.  Located at 36 West Broughton Street in the Historic District of Savannah, the outside of this store is only a charming taste of all the wonder that's to come inside!
Upon entering, you are greeted by sumptuous displays of old statuary and a large "Paris" sign emblazoned at the back of the store.  
Antique wooden fixtures house everything from soaps, perfumes & jewelry to chandeliers, architectural elements and natural pickings (even real bee's nests!)  Kitschy taxidermy abounds, as does old photographic ephemera and supplies.  
There is a little for everyone here, as you can see from the pictures.  There is even an entire section dedicated to kids that has clothing, handmade and vintage-inspired toys, bedding, and old-fashioned marbles!  This two-story shop also has a small cafe where you can stop to order a coffee or infused water (homemade everyday with things like strawberries and basil).
If a Savannah visit is not in the immediate future, you can visit their website at www.theparismarket.com.
Although the website appears to be set-up for online sales, this service is currently unavailable.  But pay the site a visit anyway for some good old-fashioned inspiration!


Metallic Miracle-Worker: Rub n Buff!

This is one of our best friends, and something that no crafter's toolbox should be without!  Rub n Buff is a metallic wax that can be applied to any number of materials to give them a gilded look.  One of our favorite ways to use this is on cabinet hardware.  For those of you that are on a budget but are tired of their brass or chrome knobs, polish them up with a little "Antique Gold" or "Silver" Rub n Buff on a paper towel and VOILA:  Completely updated hardware!  A little goes a long way and at only around $5.00 a tube, that's a huge bargain.  

There are a huge plethora of colors available, but the only ones we have been able to find at our local Hobby Lobby are "Antique Gold," "Silver," "Copper," and "Verdigris."   To order any of the colors on this chart, you can order online at www.amaco.com.

Also use it to highlight painted wood furniture, change a gold necklace to silver, enhance carved wood molding (are you seeing how endless the possibilities are??...)